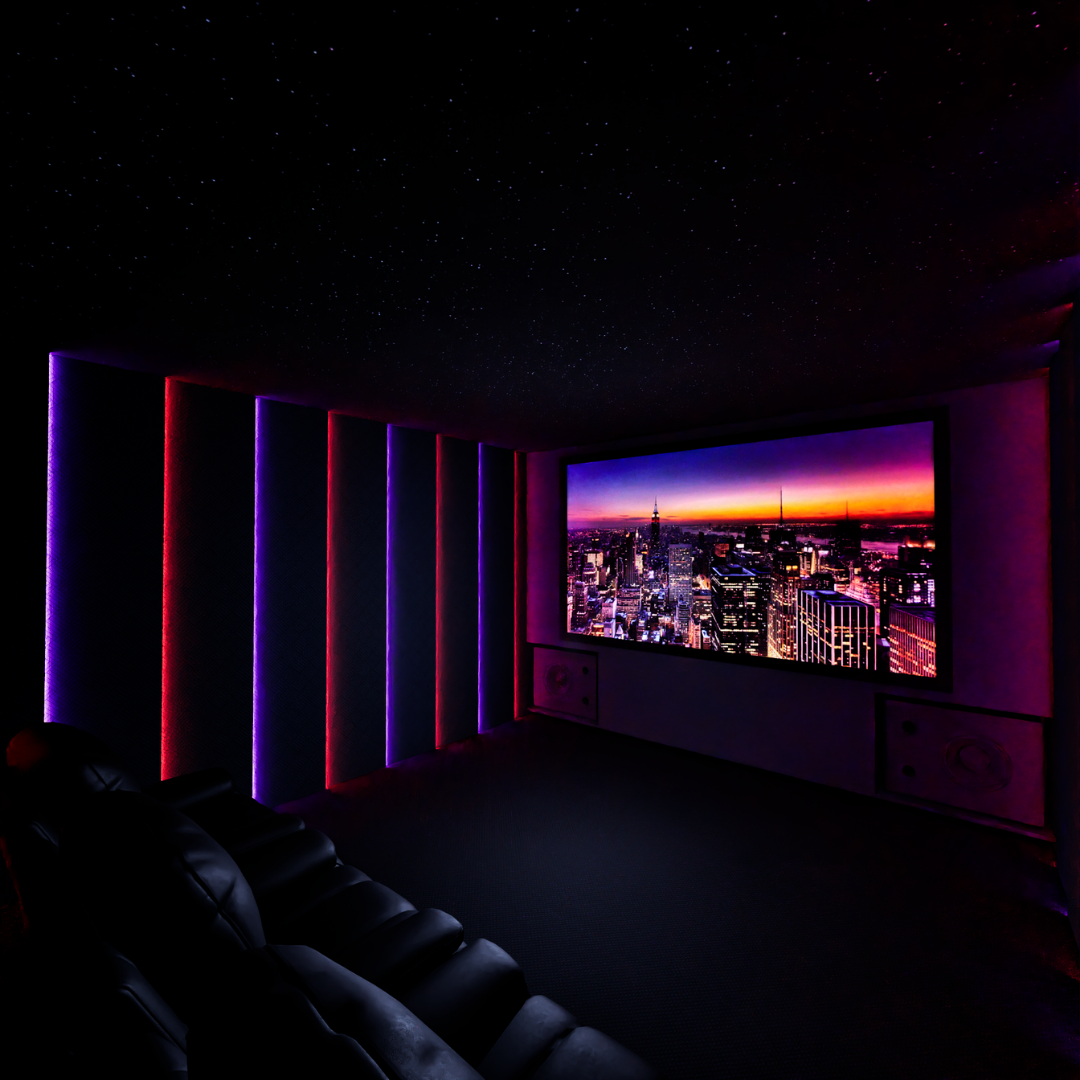
By the time most homeowners come to us, they’ve already spent hours watching YouTube reviews, comparing projector specs, and reading about Dolby Atmos speaker layouts. What they haven’t found anywhere is a clear picture of what home theatre installation actually involves from start to finish — what happens first, what needs to be planned before walls close up, how long it takes, and what separates a system that merely works from one that genuinely performs.
That gap is where most home cinema projects go wrong. Not because homeowners choose the wrong projector or the wrong speakers, but because the process itself — planning, first-fix cabling, acoustic treatment, calibration — gets rushed, skipped, or handled in the wrong order. We’ve been called in often enough to fix beautifully finished cinema rooms with disappointing sound to know that installation process matters just as much as equipment selection.
This guide walks through everything involved in a professional home theatre installation — from the very first planning conversation through to final calibration and handover — along with the technical concepts, common pitfalls, and cost considerations every Melbourne homeowner should understand before starting a home cinema, media room, or theatre room project.
Table of Contents
- What Is a Home Theatre or Cinema Room Installation?
- Why Homeowners Invest in Professional Home Theatre Installation
- The Home Theatre Installation Process, Step by Step
- Key Components Involved in a Home Theatre Installation
- Audio System Design and Installation
- Speaker Placement and Positioning
- Dolby Atmos Installation Explained
- Projector and Screen Installation Considerations
- Room Dimensions and Layout Planning
- Seating Installation Considerations
- Acoustic Treatment Installation
- Lighting and Atmosphere Integration
- Common Mistakes Homeowners Make
- Why Professional Installation Matters
- Cost Considerations in Australia
- Future Trends in Home Theatre Installation
- FAQ
- Why Choose Kyte Tech?
What Is a Home Theatre or Cinema Room Installation?
A home theatre installation is the process of designing, wiring, fitting, and commissioning a complete audiovisual system within a dedicated or semi-dedicated space — turning a room into a genuine cinema room, media room, or theatre room rather than simply placing a TV and a soundbar against a wall.
A proper installation covers far more than mounting equipment. It includes room and acoustic planning, first-fix cabling and containment before walls and ceilings close up, speaker and display positioning to technical specification, acoustic treatment, lighting integration, and full calibration once everything is in place. Each of these stages depends on the ones before it — which is exactly why the order of operations matters so much.
Why Homeowners Invest in Professional Home Theatre Installation
We hear a consistent set of reasons from Melbourne clients when they explain why they’ve chosen to have their home cinema professionally installed rather than assembled piece by piece themselves:
- They’ve tried a DIY setup previously and found the sound or picture disappointing relative to the cost of the equipment.
- They’re mid-renovation or building new, and want cabling and structural provisions planned in correctly before walls and ceilings close up.
- They want a Dolby Atmos or full surround sound experience but don’t know how to translate a speaker package into correct positioning for their specific room.
- They want one simple, unified way to control lighting, blinds, and the AV system — not a stack of remotes.
- They’ve realised that acoustic treatment and calibration, not just equipment cost, are what actually separate an average system from an exceptional one.
In almost every case, it comes down to wanting the process done properly once, rather than assembled and re-worked over time.
The Home Theatre Installation Process, Step by Step
This is the sequence we follow on almost every project, adjusted for whether it’s a new build, renovation, or retrofit into an existing finished room.
1. Consultation and Room Assessment
We start by understanding how you actually want to use the space — dedicated cinema room or flexible media room, how many people it needs to seat, and what’s driving the project. We assess the room’s dimensions, construction, natural light, and any structural constraints before recommending a system architecture.
2. System Design and Specification
Based on the room assessment, we design the full system — display type, audio configuration, speaker layout, acoustic treatment plan, and lighting/control integration — sized specifically to the room rather than a generic package.
3. First-Fix Planning (New Builds and Renovations)
This is the stage most DIY and even some trade installations get wrong. Before walls, ceilings, or joinery close up, we plan and run all necessary cabling and containment — speaker cabling, power provisions for in-ceiling and rear speakers, projector and screen power, and control wiring — well ahead of the equipment actually being installed. Getting this stage right avoids costly rework or exposed cabling later.
4. Acoustic Treatment Installation
Acoustic panels, bass traps, and ceiling treatments are installed based on the acoustic plan developed during design — positioned at calculated reflection points and bass build-up zones, not simply wherever looks convenient.
5. Equipment Fit-Off and Mounting
Projector, screen, television, speakers, and AV processing equipment are mounted and connected according to the design specification — including precise speaker positioning and alignment, not just secure fixing.
6. System Calibration and Commissioning
This is where a professional installation earns its keep. We calibrate speaker levels, distances, and delays; run room correction to address the specific acoustic characteristics of your space; and fine-tune projector or display settings for accurate colour and contrast. This step alone is often the difference between a system that sounds “fine” and one that sounds genuinely reference-quality.
7. Control Integration and Handover
Lighting, blinds, and AV components are brought together under a single, simple control interface — typically a one-touch “Movie Mode” — and we walk clients through operating the system before handover.
8. Ongoing Support
A premium installation doesn’t end at handover. Firmware updates, servicing, and adjustments as your household’s needs change are all part of a properly supported system.
Key Components Involved in a Home Theatre Installation
Every installation we deliver, regardless of budget or room size, is built from the same core components:
- A calibrated, correctly sized display (projector/screen or television)
- A multi-channel surround or Dolby Atmos-enabled audio system
- Speakers positioned according to specification
- Acoustic treatment appropriate to the room’s size and construction
- Layered, controllable lighting
- Seating positioned at the correct viewing distance and height
- A unified control system
Skipping or under-specifying any one of these is the most common reason we’re called in to remediate an existing installation.
Audio System Design and Installation
Audio is where installation quality is felt most directly. We design and install around several standard architectures:
- 5.1 Surround Sound: Front left/right/centre, two surrounds, and a subwoofer — a solid baseline for smaller rooms.
- 7.1 Surround Sound: Adds rear surround channels for improved rear-field imaging in medium and larger rooms.
- Dolby Atmos (5.1.2, 7.1.4 and beyond): Adds height or overhead channels for a genuinely three-dimensional soundstage.
We size the installation to the room’s volume and construction, not simply to the largest package available — an oversized system in a small room performs worse, not better.
Speaker Placement and Positioning
Correct speaker positioning is one of the most technical parts of any installation, and one of the easiest to get wrong without experience.
Front Left, Centre, Right
Installed at seated ear height, equidistant from the main listening position, with the centre channel aligned as closely as possible to the height of the display.
Surround Speakers
Positioned slightly behind and above the listening position, angled toward it, to create an enveloping side-field rather than a directional point source.
Rear Surrounds (7.1 and Above)
Installed directly behind the main seating row to fill in the rear soundstage.
Subwoofer Installation
Subwoofer position has an enormous effect on how evenly bass is distributed through a room. We use the “subwoofer crawl” method during commissioning — testing several positions to find the smoothest bass response — and in larger or acoustically challenging rooms, we’ll often install dual subwoofers to even out room modes.
Height/Atmos Speaker Installation
Whether in-ceiling, upward-firing, or ceiling-mounted, height channels need to be installed according to Dolby’s specified angles relative to the listening position. This is exactly why first-fix planning matters — retrofitting correct height speaker positions into a finished ceiling is far more disruptive than planning for them during construction.
Dolby Atmos Installation Explained
Dolby Atmos is an object-based audio format. Rather than mixing sound into fixed channels, sound engineers place individual “sound objects” — a helicopter, footsteps, a line of dialogue — anywhere in three-dimensional space, including overhead. Your Atmos processor then renders that mix in real time to match your specific installed speaker layout.
For most premium residential installations, we recommend a minimum 5.1.2 configuration, scaling up to 7.1.4 or beyond for larger dedicated cinema rooms where ceiling height and ceiling structure allow. Correct installation and calibration of the height channels is what determines whether the overhead effect feels genuinely immersive or falls flat.
Projector and Screen Installation Considerations
Projector Installation
- Laser Projectors: Our default recommendation, offering consistent brightness over a much longer lifespan and typically better colour stability than lamp-based units.
- Throw Distance and Mounting: Projector placement must be calculated against the specific model’s throw ratio and target screen size — an installation mistake we’re regularly asked to correct.
- Brightness Matching: Lumen output needs to be matched to screen size and the room’s light-control level, not simply maximised.
Screen Installation
- Fixed-Frame Acoustically Transparent Screens: Our preferred choice for dedicated cinema rooms, allowing front speakers to be installed directly behind the screen for accurate on-screen sound alignment.
- Motorised Screens: A strong option for multi-use rooms, retracting completely when not in use.
- Ambient Light Rejecting (ALR) Screens: Purpose-built for installation in rooms with some ambient light.
Television Installation for Cinema Use
Where a TV is the right fit, we typically recommend OLED for dedicated or low-light rooms, and premium Mini-LED/QLED for rooms with more ambient light. Mounting height and viewing angle are calculated as part of the installation, not decided on-site by eye.
Room Dimensions and Layout Planning
Room geometry shapes almost every other installation decision:
- Length-to-width ratio: Proportions closer to 1:1.6 distribute bass more evenly than square rooms, which are prone to strong standing waves.
- Ceiling height: Affects achievable screen size, projector throw distance, and available positioning for height/Atmos speakers.
- Screen wall placement: Ideally free of doors, windows, or reflective surfaces that could introduce light leakage.
- Cabling and containment planning: Needs to be mapped against the room’s final layout before any walls or ceilings close up.
We model these dimensions with clients before construction begins wherever possible, since correcting a poorly proportioned room after the fact is far more costly than planning around it from day one.
Seating Installation Considerations
Seating position affects viewing angle, sound imaging, and comfort — and needs to be planned alongside the AV installation, not decided independently.
- Viewing distance: Roughly 1–1.5 times the screen’s diagonal size for projector setups, slightly further for large-format TVs.
- Row height (risers): Around 150–200mm per row in multi-row rooms, keeping sightlines clear over the row in front.
- Central seating position: The best seat in the house should sit on the room’s centreline, matching the calibration point used during commissioning.
- Seat spacing: Enough separation to avoid seating dampening or unevenly reflecting sound across the listening area.
Acoustic Treatment Installation
Acoustic treatment is, in our experience, the most consistently under-installed part of home cinema projects — and the one with the biggest impact on perceived sound quality.
Why Untreated Rooms Underperform
Hard, parallel surfaces cause sound reflections, flutter echo, and uneven bass build-up, regardless of speaker quality. A premium system installed in an untreated room will sound noticeably worse than a modest system installed in a well-treated one.
Core Treatment Types We Install
- Acoustic panels: Positioned at calculated first-reflection points on side and rear walls.
- Bass traps: Installed in room corners, where low-frequency energy naturally accumulates.
- Ceiling clouds/panels: Reduce overhead reflections, particularly important in rooms with Atmos height channels.
- Soft furnishings and flooring: Factored into our acoustic modelling as genuine contributors to overall absorption.
Soundproofing vs Acoustic Treatment
These are frequently confused during installation planning. Soundproofing (isolation) controls sound transferring in or out of the room; acoustic treatment controls how sound behaves inside it. Most premium installations address both, but they’re separate scopes of work requiring different techniques.
Lighting and Atmosphere Integration
Lighting integration is where a home theatre installation moves from “functional” to genuinely premium.
- Layered, dimmable circuits: Separate control for general lighting, feature/accent lighting, and pathway/step lighting.
- Light control at the screen wall: Block-out curtains or blinds, even in TV-based rooms, significantly improve daytime contrast.
- Bias lighting installation: A soft light source behind the screen or TV reduces eye strain and improves perceived black levels.
- Scene control integration: Programming lighting, blinds, and AV equipment to respond to a single “Movie Mode” trigger — one of the most consistently appreciated parts of any installation.
Common Mistakes Homeowners Make
Across years of new installations and remediation projects, these are the mistakes we see most consistently:
- Starting equipment purchases before the room and system are properly designed, leading to mismatched specifications.
- Leaving cabling and containment as an afterthought, rather than planning first-fix requirements before walls and ceilings close up.
- Positioning speakers for convenience rather than performance, undermining the acoustic design regardless of equipment quality.
- Skipping or under-specifying acoustic treatment, treating it as optional rather than core to the audio system.
- Underestimating ceiling structure requirements for Atmos height speakers, leading to a flat or disconnected overhead effect.
- Relying on factory auto-calibration alone, rather than a proper, room-specific commissioning process.
- Overlooking control system integration, leaving households juggling multiple remotes instead of one simple interface.
- Choosing an installer based on equipment brand alone, rather than design and installation expertise.
Every one of these is avoidable with a properly planned installation process from the very first consultation.
Why Professional Installation Matters
It’s entirely possible to buy equipment online and install it yourself. It’s much harder to make it perform the way a properly engineered installation does. Professional installation brings:
- Acoustic modelling specific to your room’s dimensions and construction, not generic placement guidelines.
- Correct first-fix planning, coordinated with builders, joiners, and electricians so cabling and structural provisions are built in properly the first time.
- Precision speaker and display positioning, installed to technical specification rather than convenience.
- Full calibration, tuning levels, delay, and room correction to your specific space — something a factory auto-setup can’t replicate.
- Unified control integration, so the whole system operates through one simple interface.
- Long-term support, including servicing, firmware updates, and adjustments as your household’s needs change.
We’re regularly engaged to remediate DIY and budget installations, and the gap between “a home cinema with good gear” and “a home cinema that actually performs” almost always comes down to the installation process itself, not the equipment brand on the box.
Cost Considerations in Australia
Every home theatre installation we quote differs, since room size, construction stage (new build vs retrofit), and system ambition all affect the investment required. As a general guide for the Melbourne market:
- Entry-level media room installation (premium TV, 5.1 surround, basic acoustic treatment): a straightforward, accessible starting point for households wanting a genuine step up from a standard lounge room setup.
- Mid-range dedicated cinema room installation (laser projector, acoustically transparent screen, 7.1 or Atmos audio, full acoustic treatment, lighting control): the sweet spot for most of our dedicated cinema room clients.
- Premium/flagship cinema room installation (reference-grade projection, extensive Atmos configuration, bespoke acoustic and joinery integration, full smart control): for homeowners wanting a genuinely world-class result with no compromises.
Because installation costs vary considerably depending on whether a project is a new build (where cabling and structure are easy to plan for) or a retrofit into an existing finished room, we always recommend a proper in-home consultation rather than working from a generic price list.
Future Trends in Home Theatre Installation
The home theatre installation process continues to evolve alongside the equipment itself:
- Laser projection becoming the installation default, as prices come down and lamp-based units are phased out.
- Brighter, higher-contrast projectors designed to perform better during installation in rooms with some ambient light.
- Object-based audio maturing further, with Dolby Atmos-compatible height-channel installations becoming accessible for mid-range projects, not just flagship builds.
- Tighter integration between AV and lighting/blind control, simplifying installation into a single coordinated scene system.
- Greater emphasis on acoustic treatment as a standard installation inclusion, rather than an optional add-on.
We keep across these developments closely, because a home theatre installation is a long-term investment — we design and install every system with an eye to what will still make sense in five to ten years, not just what’s newest today.
FAQ
What does a home theatre installation cost in Australia?
Costs vary widely depending on room size, whether it’s a new build or retrofit, and the level of finish — from an accessible media room upgrade through to a flagship dedicated cinema room. We recommend a personalised consultation for an accurate quote based on your space and goals.
How long does a home theatre installation take?
Timelines depend on whether the project is integrated into a new build or retrofitted into an existing room, and on the complexity of the acoustic treatment, joinery, and control system involved.
How many speakers do I need for Dolby Atmos?
A genuine Atmos experience starts at a 5.1.2 configuration (five main channels, a subwoofer, and two height channels), with 7.1.4 and larger configurations suited to bigger, dedicated cinema rooms.
What is the difference between a media room and a home cinema?
A media room is typically a multi-use space that also functions as a family or living area, designed to perform well with some ambient light. A home cinema (or cinema room) is a dedicated, usually fully light-controlled space built solely for film and television viewing.
Do I need to plan my home theatre installation before renovating?
Ideally, yes. Planning cabling, containment, and structural provisions before walls and ceilings close up avoids costly rework and allows for correct speaker and display positioning from the outset.
Is a projector or TV better for a home theatre installation?
It depends on the room. A projector and screen deliver greater scale and immersion in a dedicated, light-controlled cinema room, while a premium TV performs better in a media room used with ambient light or during the day.
Do I need acoustic treatment installed in my home cinema?
Yes — acoustic treatment addresses reflections, flutter echo, and uneven bass that even the best speakers can’t overcome on their own, and is one of the most important factors in how a system actually sounds.
Can I upgrade an existing surround sound system to Dolby Atmos?
In many cases, yes — depending on your current AV receiver or processor and speaker layout. An assessment of your existing installation is the best starting point before adding height channels.
What’s involved in calibrating a home theatre system?
Calibration involves tuning speaker levels, distances, and delays, running room correction for your specific space, and fine-tuning display settings for accurate colour and contrast — a step that goes well beyond a factory auto-setup.
Should I hire a specialist or a general electrician for home theatre installation?
A specialist home theatre installer brings acoustic modelling, speaker positioning expertise, and calibration experience that general electrical work doesn’t cover — all of which materially affect how the finished system performs.
Why Choose Kyte Tech?
Kyte Tech is a Melbourne-based specialist in custom home theatre, cinema room, and media room installation. We manage the entire process from first consultation through to final calibration — room assessment, system design, first-fix planning, acoustic treatment, speaker and display installation, and full commissioning — so the result performs exactly as intended, not just on paper.
Whether you’re planning a new build, renovating an existing space, or upgrading a system that’s never quite delivered the experience you expected, our team brings the technical expertise and installation process discipline to get it right the first time.
Get in touch with Kyte Tech today to book a personalised home theatre installation consultation and start planning your dream cinema room the right way.